Focus Stacking with Photoshop.
Focus stacking is a great technique for achieving a greater depth of field in your images. The following is a step-by-step guide on how to stack your images using Photoshop. Putting your images together on your computer is the next important step in the Focus Stacking process. This is where we process the photographs we have captured with our camera and determine what area of each is in focus. Once we have sorted the photos that we have taken from foreground to background, we simply have to “stack” them and use software with Focus Stacking capabilities. Photoshop has always been my choice for this part of the process; therefore, I shall explain the possible options available using this software.
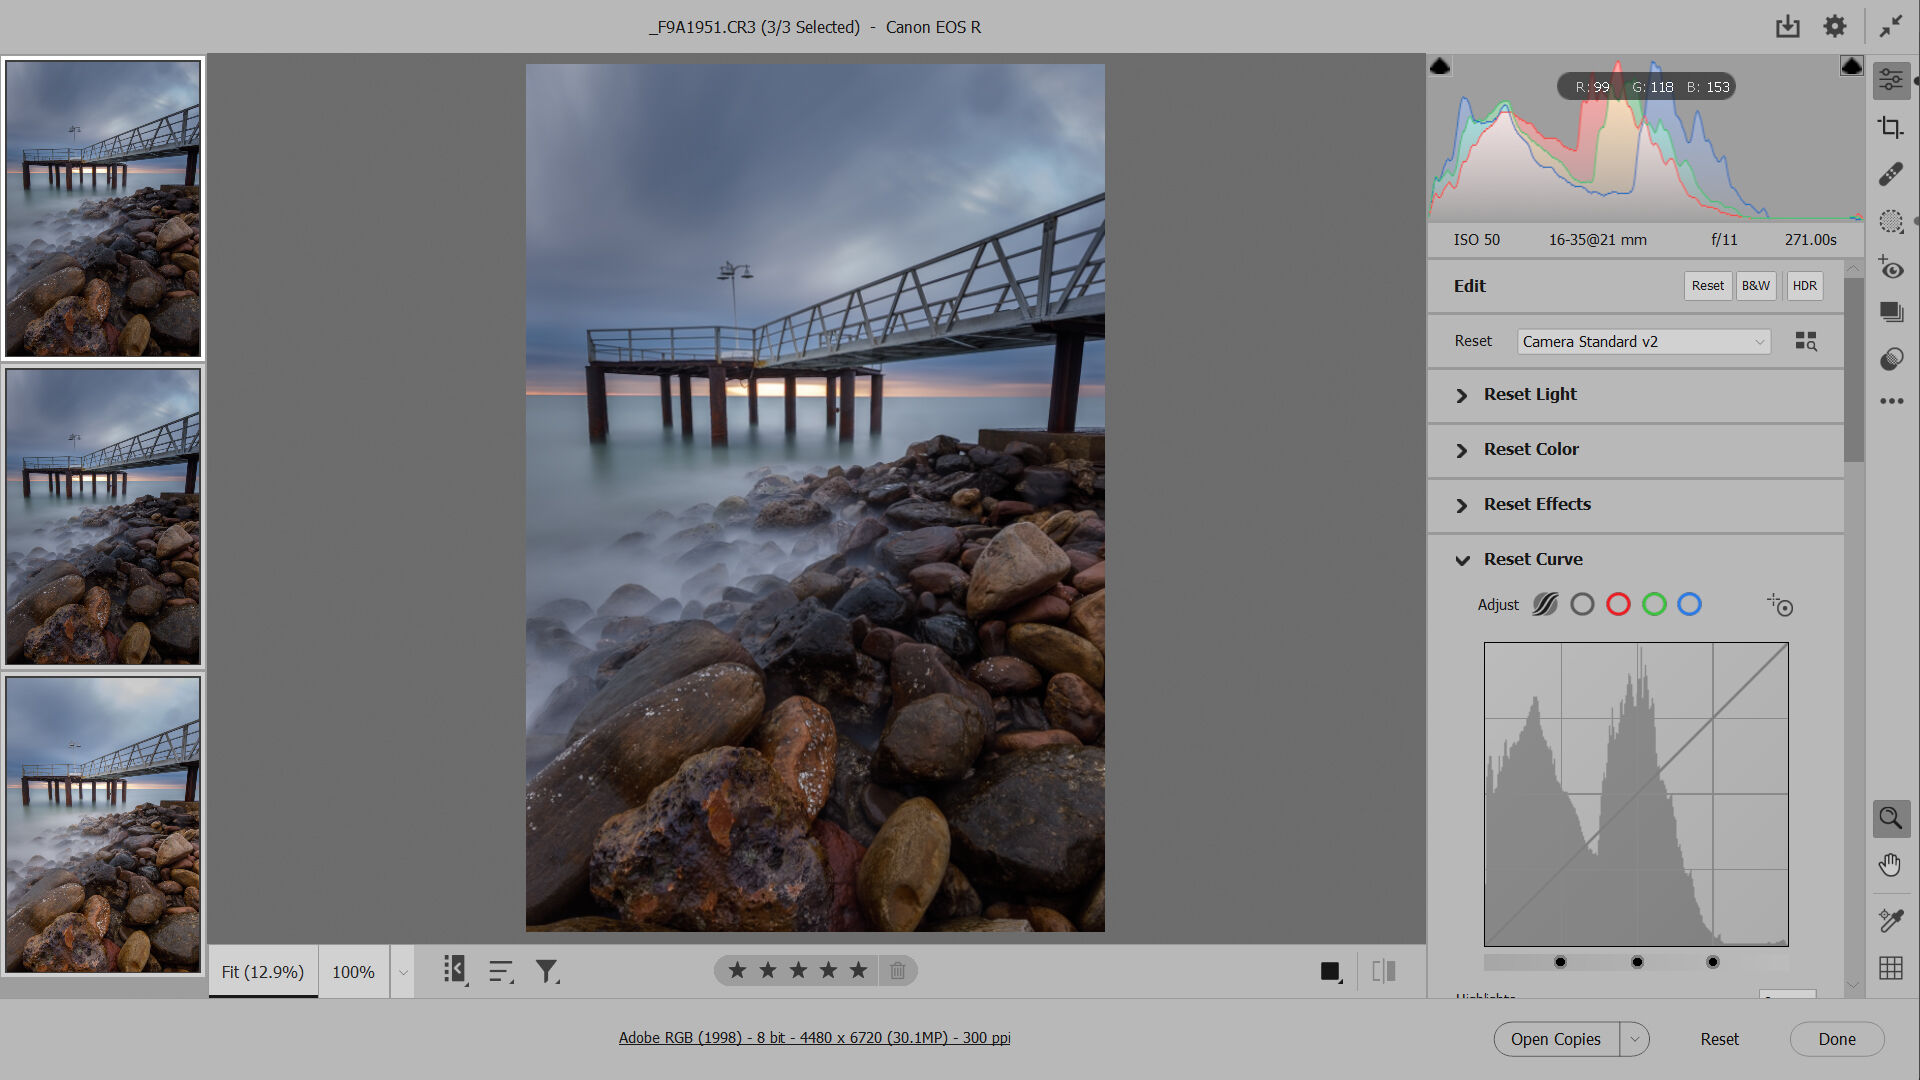
Assuming your files are RAW format, load your final entire set of images to be focus stacked into Camera Raw. Do all of the editing and adjustments you find necessary to the images. Keep in mind that the set of images can be edited simultaneously in Camera Raw. Therefore, whatever corrections you make in exposure, color, optics, detail, geometry, etc., will always be good practice to realize analogously. There may be some differences, such as exposure, and here each image will have to be adjusted separately.
Once the task of editing in Camera Raw has been completed, import your photos into Photoshop and prepare for montage. You can load your edited images into Photoshop directly from Camera Raw by pressing the open button (be sure all images are selected). In this example, I will be using three images: one where the area in focus is in the background, another focused more or less in the mid-ground, and one last image where the foreground is in focus.
Stacking and alignment
Go to File, then Scripts and Load Files into Stack. From here, collect the three photos for assembly (stitching). Keep your images in order if there are more than two in the set: foreground to background or vice versa.
Photoshop usually does a remarkable job at aligning all images in a stack. If you have followed the steps correctly in Part I “Capturing the Scene”, on keeping your camera in the same position for each image taken, it is almost guaranteed that Photoshop will align all images with great precision. That said, I recommend enabling the “Attempt to Automatically Align Source Image” option so that Photoshop aligns your images for you.
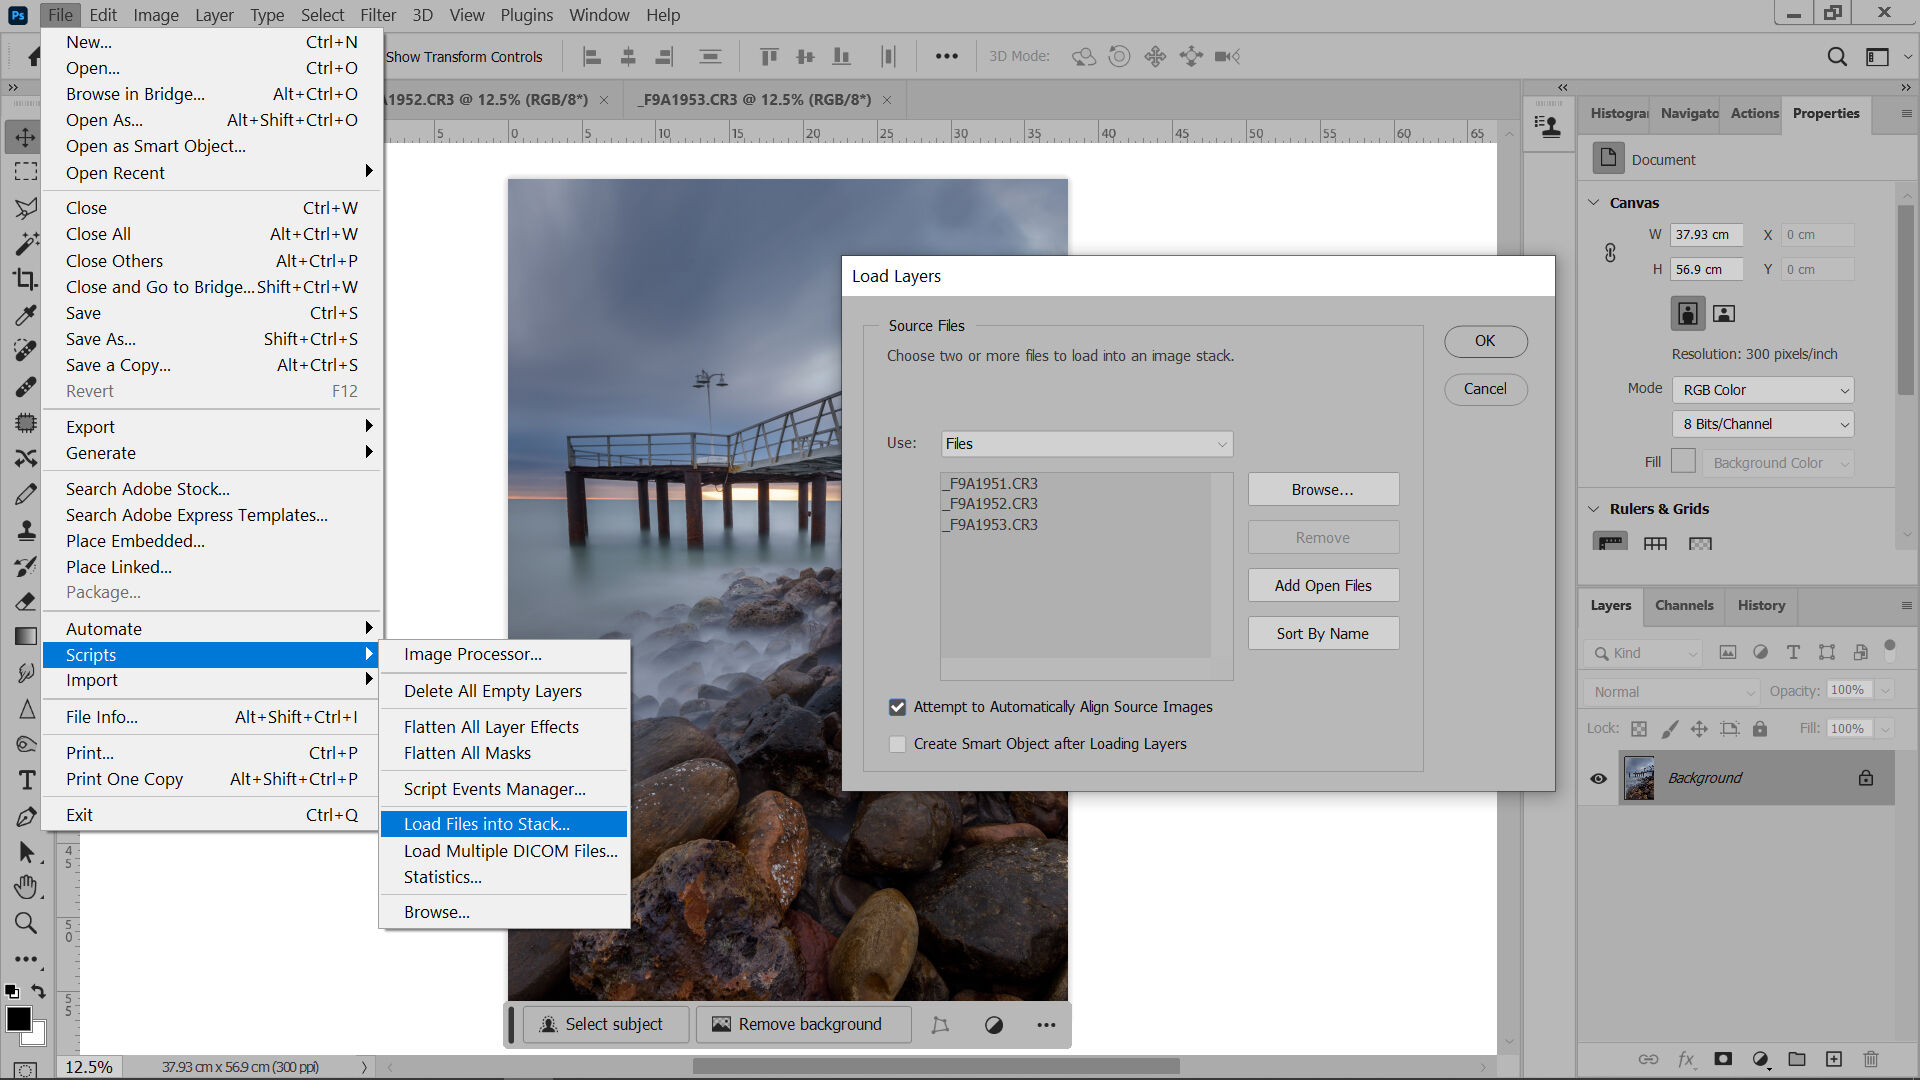
Once the process has been completed, a new window will appear containing all of the images as layers to be stacked.
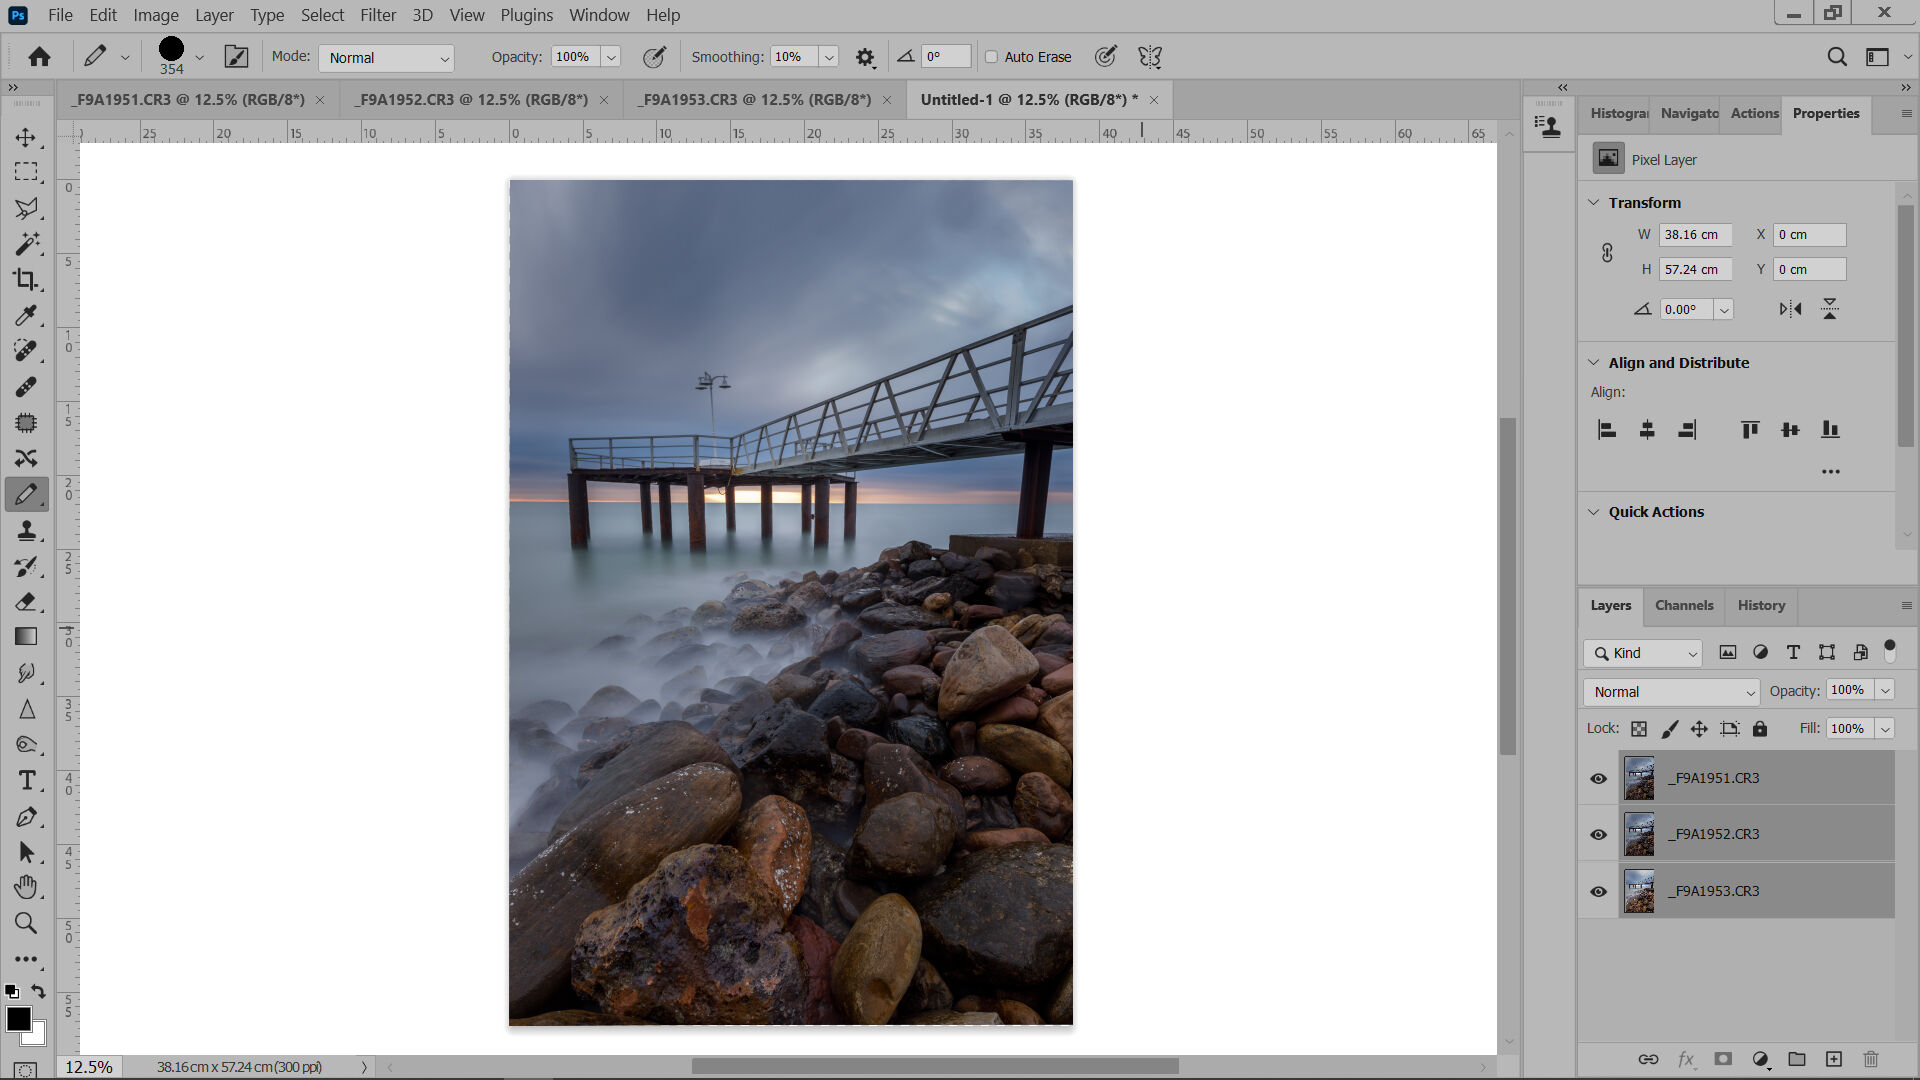
Mounting the set of images.
Select the layers you wish to blend: in this example we will choose all three in the layer panel. In the taskbar, go to Edit, select Auto-Blend Layers. A new window will open on the screen where you should select the following options: (1)Stack Images, (2)Seamless Tones and Colors and (3)Content Aware Fill Transparent Areas. Press the OK button to allow Photoshop to determine the areas in focus of each image and mask out the unfocused zones.
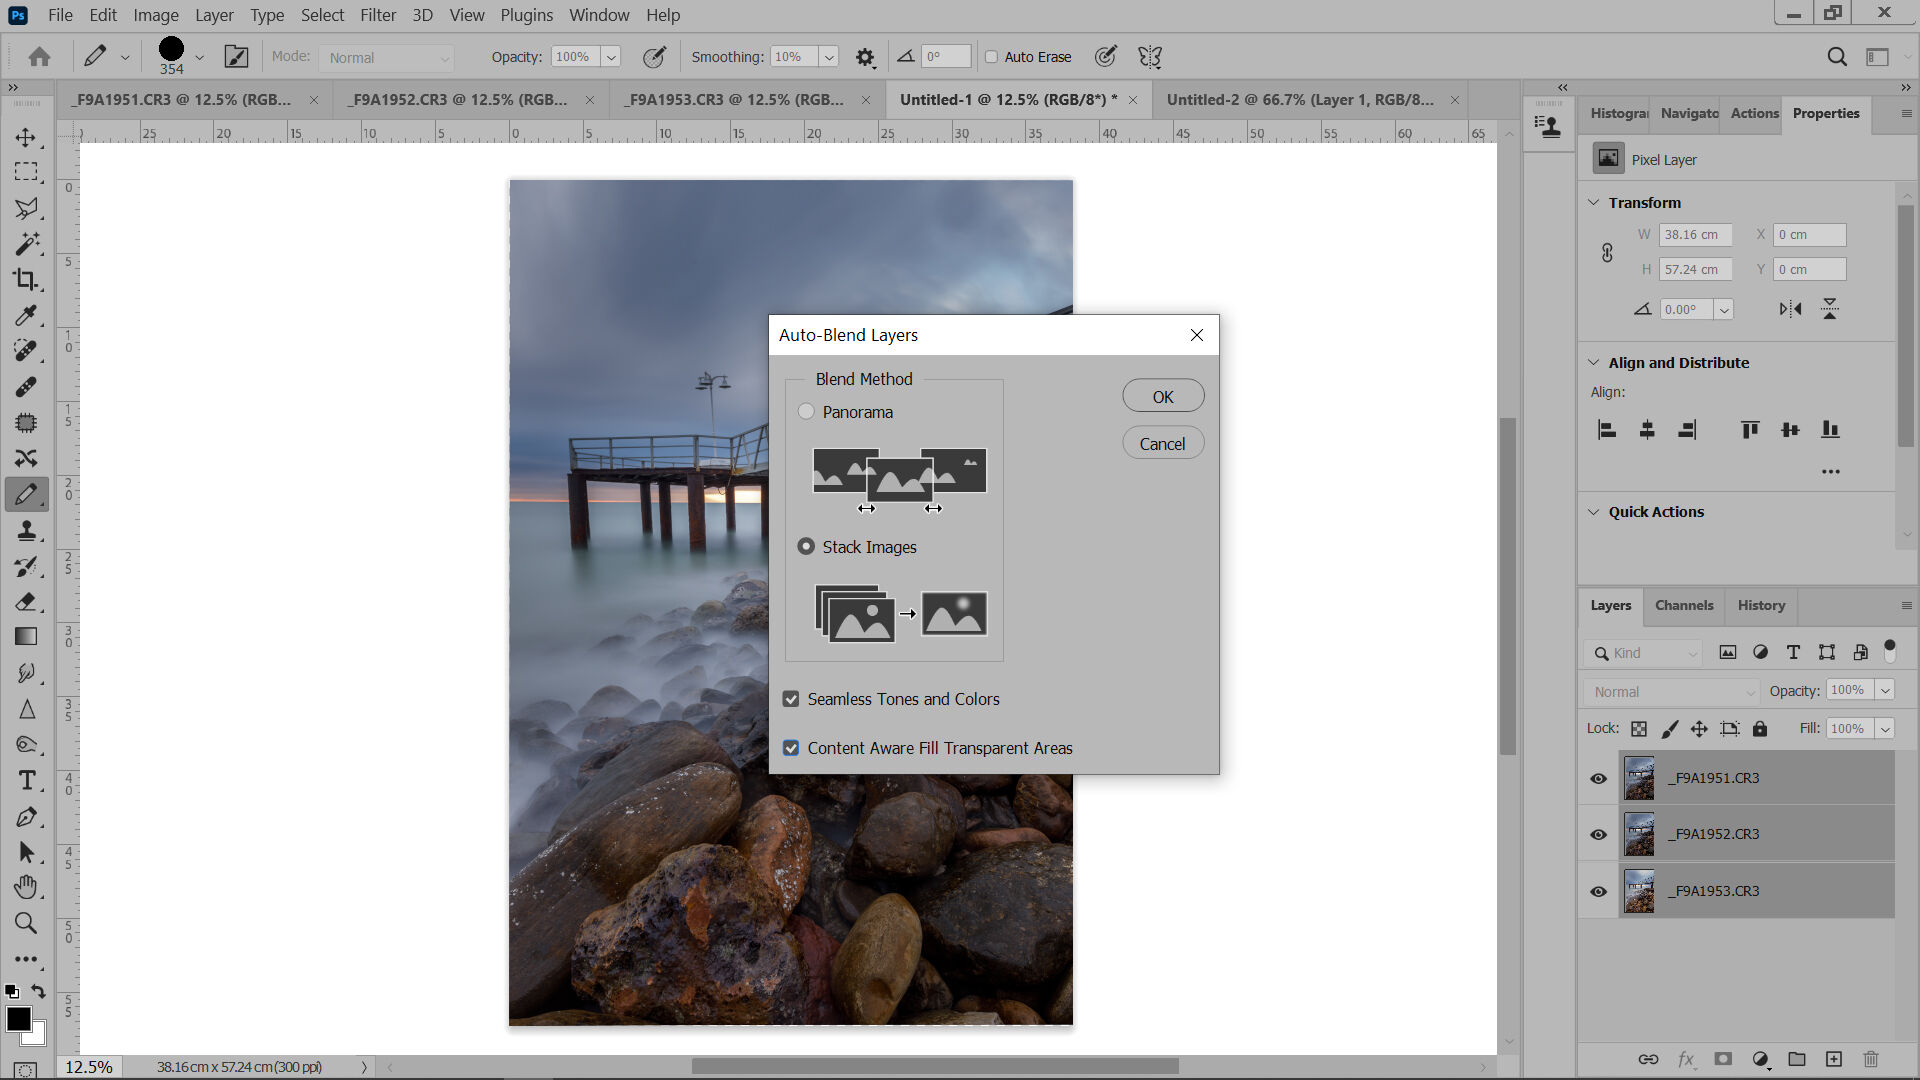
The software then stitches the three photos together to create a single, fully focused image of the landscape composition. Photoshop will merge all of the layers and create a new layer placed first in the panel. The three original layers remain each with their own mask in a non-destructive manner should further editing be required.
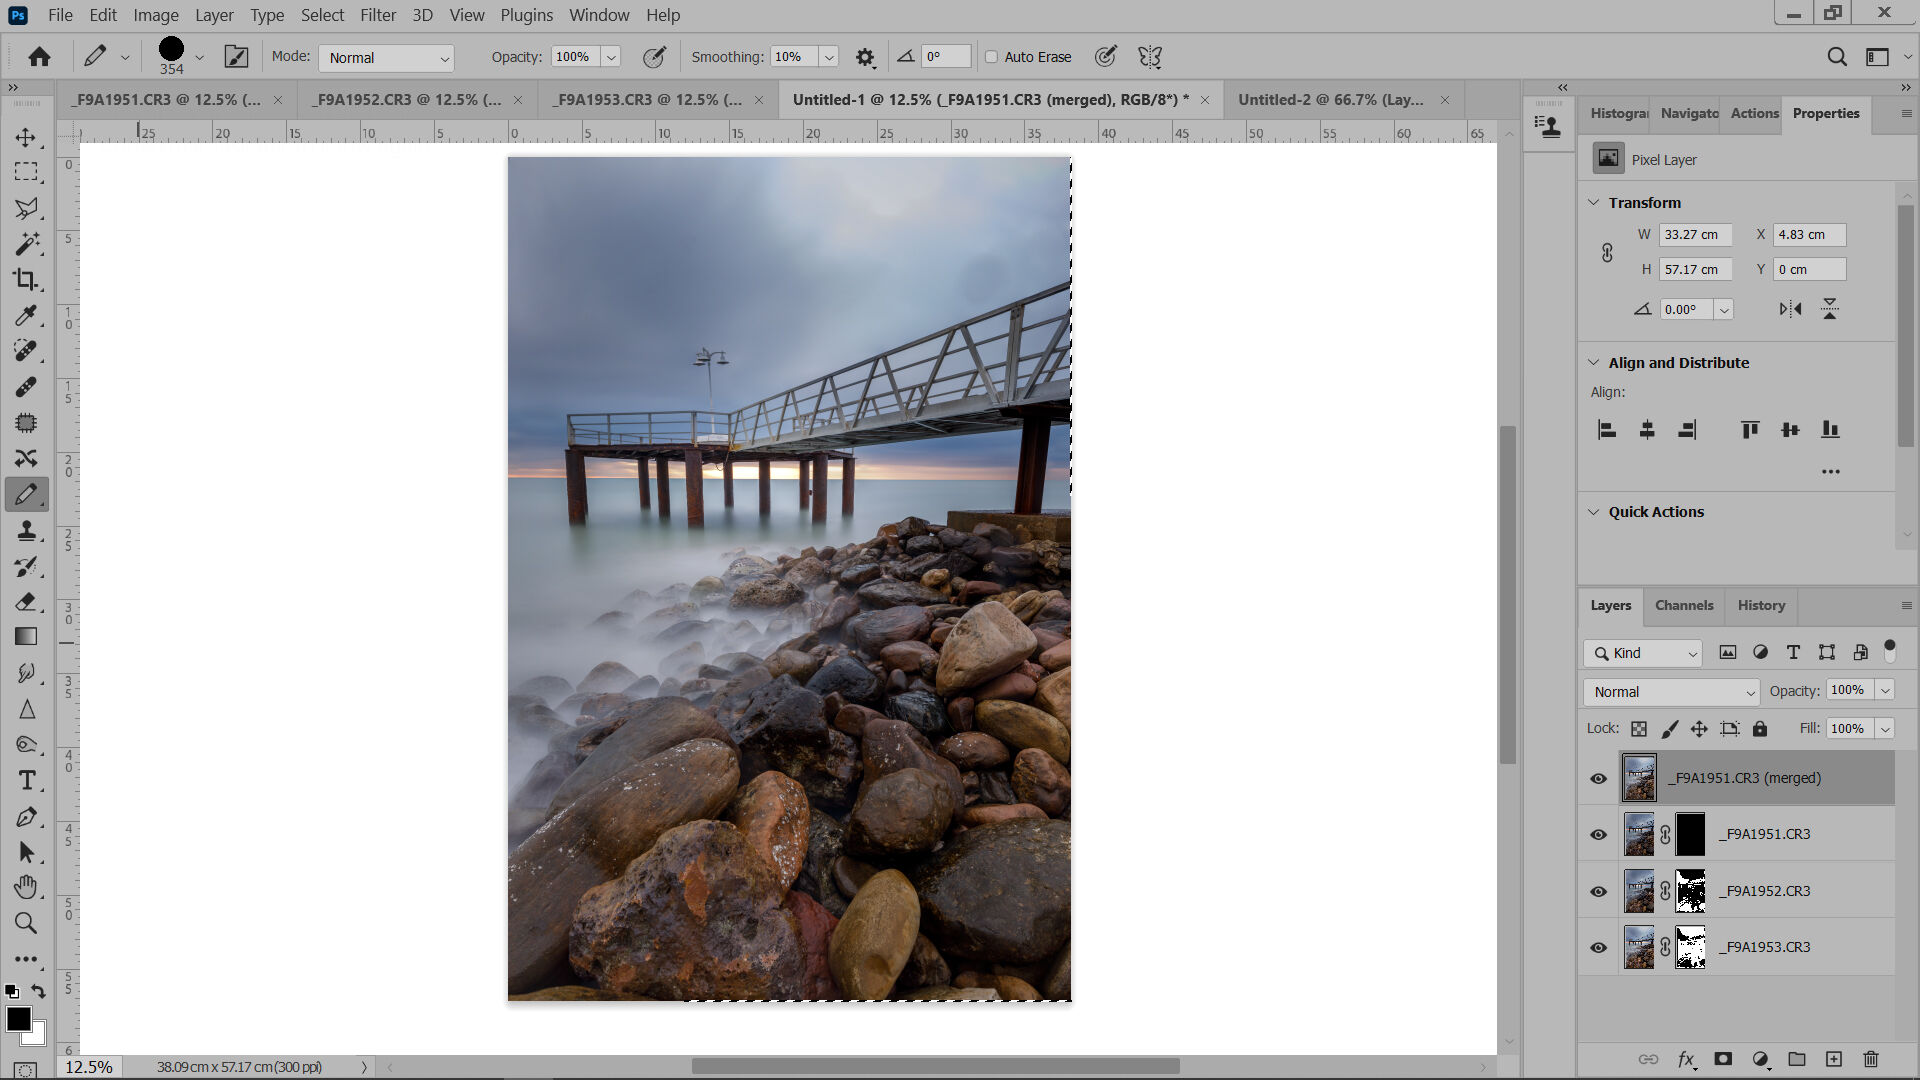
Once satisfied, you can adjust the overall image using tools like Curves, Levels, or Color Balance to enhance the final look. Save your image in the desired format (e.g., JPEG, TIFF, PSD) by going to File > Save As.
Tips for Success
- Use consistent exposure settings (shutter speed, ISO, aperture) across all shots to avoid differences in brightness.
- Ensure that your subject is static; movement can cause issues in blending.
- If you find issues with halos or other artifacts, try adjusting the blending settings or using the Clone Stamp Tool for further corrections.
By following these steps, you should be able to effectively stack your images in Photoshop, resulting in a beautifully detailed final photograph with enhanced depth of field!
Be sure to follow me on Instagram or Flickr for more tutorials and updates!
